Upgrading the galley stove!

I’m writing this post with mixed feelings.   We have a HilleRange stove/cooktop in the boat that works great.   I even feel it’s perfectly safe, with redundant shut off systems.   (This is nice, as propane is heavier than air, so it sinks into the bilges and just waits for a spark.)   First, ‘one’ can shut off the tank.   If ‘one’ is too lazy to do that, there is a shutoff in the kitchen.  Sounds great, right?   Not if you are an insurance agent.   They want a third failsafe at the burner to shut off the gas if the flame blows out.   So, let’s dig in the wallet and replace something which works perfectly…

Jesper and I pulled the old stove and cleaned the space.   It’s well designed and lined with stainless steel sheet.   It cleaned up nicely and was ready for the new stove.  Notice how the space is curved in the back;  This is to allow the stove to swing when the boat is heeling (aka falling over).

We made a large dent in my wallet and purchased a Dickinson Mediterranean stove, which was reported to bake evenly (oddly a rare attribute) and was well constructed.  It settled in nicely and works like a champ!

At the end of the day, we have a great stove, and more importantly our insurance will cover us if we go ‘boom’ due to a propane leak.

Pulling the chain

We’ve gotten way behind in posting our activities. The next few will be out of order as we both catch up and document what we’re doing now.  In summary, the mast is back in, we have all new standing rigging, all new sails–we will tell you all about it soon!

Perspective has 300 feet of 3/8 inch chain, which is great for holding power. Unfortunately our chain is pretty rusted. Rather than spending the $1500 to replace it (~$5/ft), We decided to re-galvanize it ($.75/lb).

Jesper and I tackled that project yesterday, which entailed pulling the anchor and 300 feet of chain. We quietly loaded the 450 pounds of chain into a dock cart, which I’m pretty sure the dockmaster would consider an unapproved use of their flimsy fiberglass carts.  

Jesper then had the brilliant idea to tackle the ramp at high tide, which was the only way our aging bodies would get it up the ramp.

Below is a picture of it loaded in the always handy Home Depot rental truck. As always, I’m very impressed with Home Depot from a cost and simplicity perspective.

In a couple weeks we should have chain that’s good as new!

Thanks as always to Jesper for his expertise and strong back. 

Installing the mast deck collar

For those of you who are non-sailors, our mast penetrates the deck and is ‘stepped’ on the keel.  Where the mast penetrates the deck, there is a metal collar to reinforce the area and stabilize the deck. 

Our old mast collar was completely corroded.  The aluminum actually discintigrated when I was trying to remove it.  


We had a new collar fabricated by Benchmark  Welding.  It was both a work of art and very sturdy.  

Sarah and I installed it this weekend.  It began by filling the existing holes as we changed the pattern to bolt into clean fiberglass. I haven’t played with fiberglass since college and had quite a bit of fun. 


We let this cure over night.  

The next morning, sanded and cleaned the area with acetone.  We marked the new hole pattern and began drilling.  The first hole was stressful.  It’s amazing how fast a sharp drillbit will go through 3/4″ fiberglass.  

I applied a good base of 3M 4000UV as bedding material and bolted it all together.  All in all, easier than I though to install. 

Holes drilled and dry fitted
Applying plenty of 4000
Evenly tightening the bolts
Drilling out the 1/2 in hole for the deck tension thingy
Finished product looks pretty good!!

Polishing our pole

Our mast has a fair amount of surface and bi-metal corrosion.  This is very normal as it’s painted and has lots of stainless drilled into the aluminum.  We decided to go back to basics and strip the mast and keep it aluminum rather than repainting.  This would save us some money at the expense of our labor, and in theory be lower maintenance.  

The downside of bare aluminum is that it oxidizes.  Some people don’t like the look, though the oxidization creates a stable barrier to the elements.  I’m fine with the ‘look’ but as I’m stripping the paint anyway I was guided by Chris at C.C. Rigging to polish and wax the mast.  This will make it shine and the wax will slow the oxidation.  

So began my Christmas holidays and two weeks of stripping, sanding, buffing and polishing.  


We discovered that at some point in its life, someone took an angle grinder to the mast presumably to remove some hardware.  Very disappointing, but I sanded most of it out over a day or two. 


Here is a good progression of the mast. 


Notice that shine!!!!

It was a fun exercise;  I enjoyed the manual labor and I picked up new skills.  I purchased a Makita polisher for the project.  It was a handful, but it will come in handy for future gel coat projects.  

Dropping the sheets

We have a confirmed date of December 14th to pull the mast!!!   

In preparation for this, we need to remove the sails, disconnect the wiring and any extraneous running rigging.  

I have owned two boats and never needed to remove the sails and both Sarah and I were excited to tackle the project. 

We started with the mainsail.  Perspective was upgraded some time in its past to a furling main via a bolt on behind the mast Foreapar EZ-Furl system.  It had a warped worm drive and we wanted to return to a traditional stack pack main sail.  

We pulled out the main and began inspecting the system. It was relatively intuitive, so down she comes!


The main is in great shape, but not usable in the new system.  I’m sure Sarah will find creative uses with her Sail Rite sewing machine. 

The wind picked up and we dropped the staysail and jib the following morning. It was a fun and educational exercise. 

We also pulled all the wiring from the mast.  It’s all due for replacement, so very straight forward.  


We are learning more about the boat every day.  It’s lots of work, but great fun!

Forward head is complete!

I’ve been lazy with postings and finally catching up. 

We completed the head install about 3 weeks ago with the exception of final vent fittings and cosmetic touch up.  


Lesson number 1:  Venting

Venting should not be overlooked.  The original vents for both heads are made from old plastic tubing that became very brittle over 30 years of exposure to holding tank gasses.  They were broken in several places resulting in unsavory smells… All lines need replacement.  We decided to upsize the original 3/8″ line and go with 1/2″ PEX to increase airflow.

This sounds easy, right?   The boat was designed well with all venting leading to the transom.  The theory is that this keeps all holding tank gasses out of the boat and cockpit.  On a 46′ boat, this means you have a vent line running almost 50′.  There is a conduit which was helpful (which was the limiter on ventline ID), however it was in 3 non-contiguous sections.  That means you take apart a lot of the boat to run the lines.  

The line is run and I just need to connect to the holding tank with a new thru hull. 


Lesson #2:  KISS

We went with Lavac toilets as we liked the simple design.  Easy to service and all pumps are based on common components. Rumor has it that the toilet has survived flushing stuffed animals (had to be tiny) through it.  

The plumbing was not so simple.  We created an all new system that included:

  • Vented loops on the saltwater inlet and head outlet.  Lavac toilets use vacuum to pull in saltwater for the flush and need a vacuum break.  The head outlet vacuum break stops your boat from sinking if a siphon forms while configured to dump overboard…   this wasn’t needed on the previous toilet.  
  • Flexibility in waste management.  Have 4 paths for our poop.  Head to direct overboard (for offshore use), head to holding tank, holding tank to pump out and holding tank to overboard via manual whale MK5 pump.  Two pumps, two Y valves and no power required. 
  • Common pumps.  The toilet flushing pump is the same model pump used to pump offboard from holding tank.  Common parts equals less spares.  With the aft head, there will be four in total. 


Note the pvc to hose ‘barbs’. I used SeaLand hose adapters and love them.  Available online or at SeaLand/Dometic dealers  for about 3 bucks, or West Marine for 19.99. 


We are excited to have a working forward head again and can’t wait to start on the aft head. 

Lesson #3: crappy 80’s plastic

During the plumbing project we discovered that the same brittle plastic lines are used for all the cold water lines, water tank vent lines and fuel tank vent lines throughout the boat.   How did we discover this?  We shattered one under the sink in the forward head while pulling sanitation hose.  We also had a mystery puddle after filling the water tanks.  They are all on the replacement list. 


Stay tuned for more plumbing fun after our next project….Rigging!!

Moving!

Sarah and I have been focused on moving for the past several weeks.  We started by moving Perspective from Sun Harbor to Harbor Island West.  We really liked how new and clean the marina is at Sun Harbor, but they have 2-boat slips and are next to the fishing fleet.  With our developing docking skills and the long work list for the boat, we decided our own slip would suit us best.  Additionally, our ‘first’ perspective was at Harbor Island West and it felt like home. 


We are also moving house to be closer to Perspective.  The plan is to downsize a bit and to reduce the commute to the boat.  We will be in Point Loma by Halloween!!!

Plumbing projects part 1

The engine is running well and we have ordered the spacer to shift the prop another 1/2 aft.  We are hoping that will further reduce cavitation…  

I had a small project running a broken water line to the aft head.  Not a big job, but the source fitting was burried behind the motor.  Luckily I have long arms, but it still required about 30 minutes crawling on the motor and squeezing myself into way too small spaces. 

After pulling the vacuum pump on the forward head again, I decided to decommission the vacuflush. We don’t need the complicated system, nor do I want to maintain it in the future in some third world country.  Out with the old!


I’m rebuilding all the plumbing from scratch. I learned through this process that the holding tank vents are plugged and the vent hose is rotten. I was surprised that all vents run to the transom which should have been obvious….  keep those smells out of the boat.  This meant I needed to replace about 50 feet of vent hose. The positive is that there is conduit to make running easier.  The downside is that I can only run 3/8″ ID hose, which is smaller than I would like.  Such is life.  

current plumbing including leaky manual pump
Tracing the holding tank vents

We have ordered the hose and two new toilets.  We went with Lavac and are excited about the robust and proven design. They use bilge pumps as flushing mechanisms and rumor has it they have successfully  flushed a teddy bear (try that on perspective and you will retrieve it from the holding tank!!!). They will arrive Friday and I’ll have a great weekend on the boat installing two new heads. Yeah!

Busy Busy Bees

Things have been a bit crazy here and we have been ignoring the blog.  That’s changing now that we are in the water and running.  What have we been up to?

Engine installation:
The motor mounts took a bit of time to get right which delayed us about 10 days.  By the time the motor was all bolted in and ready to splash, it was Tuesday, August 16th.  All looked good.  The mechanic finished all the controls and tidied up the engine compartment. 

Sea Trial #1

On Thursday August 18th, Sarah and I took the day off for the first sea trial.  We were super excited to have our baby in the water.  It had been 9 weeks in the yard!  We were joined by our mechanic Vince and our broker Andrew.  

Remember the early Star Trek’s where Captain Kirk was pushing the warp engines and the enterprise would almost shake apart, explode and/or unexpectedly disintegrate?   Yeah, well Perspective was that Enterprise on Thursday.  The engine ran perfectly, but there was a horrific vibration that seriously made us worry.  It started at 1200 RPM and built to a crescendo by WOT(wide open throttle).  It was so bad, we couldn’t talk in the cockpit. Suffice it to say, we headed back to the yard. 

Pulling Perspective round 2
The yard was kind enough to immediately pull the boat. Everything “looked” ok;  The prop shaft spun true, the cutlass bearings appeared fine and the prop looked perfect.  Suspecting the prop, we pulled it and sent it to the prop shop and stayed in the sling all night. 


The next morning, the prop shop reported that the prop was perfect.  Back in the water she goes.  

Sea Trial #2

Friday mid-day, Our good friend and Captain Jesper took her back out for sea trial with no improvement.  We started to suspect cavitation as a contributing factor… 

Frustrated and tired of the yard dirt and treatment, we motored back to our home slip.  

The Research Project

Andrew chased down Doug Peterson who didn’t have any input.  He also spoke to the yard and Chuck Driscoll remembered commissioning the KP’s.  They were notorious for cavitation and many had the skeg reshaped to improve water flow to the prop.  Theory #1:  The skeg was disrupting water flow.   

I exercised my google skills and brushed up on my fluid dynamics.  I discovered a cause can be the spacing between the propeller and the skeg.  At this point I remembered that the propeller was too close to the skeg to insert the normal zincs.  Theory #2:  The propeller is too close to the skeg

Vince assured us that the prop is in the same spot as it was previously and was leaning toward Theory #1. 

Pulling Perspective round 3

Vince convinced the yard to give us another pull.  I was out of town and Jesper generously offered to move her to the yard and babysit the inspection.  We pulled her again on Wednesday, August 24th and the inspections began. 


While there was still debate, everyone agreed that the prop was not centered. We ordered a prop saver which would add an insurance to the shaft.  Also, the skeg shaping had already been done, so scratch theory #1.  Back in the water to await the prop saver!

Sea Trial #3

I arrived back in town Thursday night.  Jesper and I took the boat out with the prop saver installed.  What a difference an inch makes!  Keep your mind out of the gutter.  

The original vibration started around 1200 RPM’s and now started around 2500.  The total vibration was about 75% less–not gone, but definite improvement.  It’s apparent that moving the prop helped and cavitation is a large part of, if not the whole problem. 

I’m still not satisfied, so investigating a larger spacer or a 4 blade prop….  That said, it’s good enough to go to Catalina next weekend!!!!

Other projects completed:

  • Fix forward head which is a vacu-flush which stopped vacu’ing.  Shitty job. Enough said. 
  • Fix dead sump pump–thanks Jesper !
  • Fix fridge drain, not draining. 
  • Fix engine room blower.  
  • Fix propane locker drain. 
  • Fix propane system. New regulator and solenoid–thanks Jesper!
  • Climbed the mast and replaced bulb in steaming light with LED. First of many. 
  • Replace stern light–thanks Jesper!
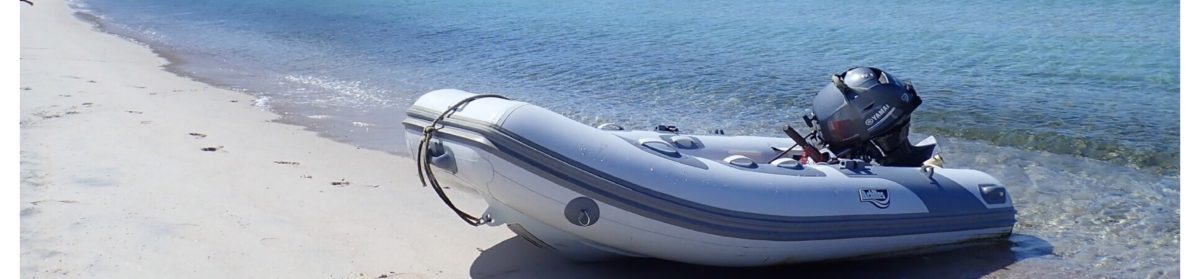
  • Got the dinghy motor running. Runs like a champ!